Restoring headlights is a relatively quick and easy process, or it would be. If not for the time it takes to prep the vehicle before beginning the job and cleaning up afterwards. While tedious and time-consuming, protecting the paint is essential. Not only the vehicle you are working on, but any other vehicles that are in proximity.
In our shop, we have experimented with a number of different products and processes. Currently, we cover the entire engine compartment with a heavy canvas tarp. Use a 2″ blue clean removing painter’s masking tape to mask around the headlights. Use a masking film to cover some or all of the rest of the vehicle. Typically, we use a pre-taped masking film to cover the front half of the vehicle. But, sometimes it is just as easy to cover the entire vehicle with a disposable drop cloth.
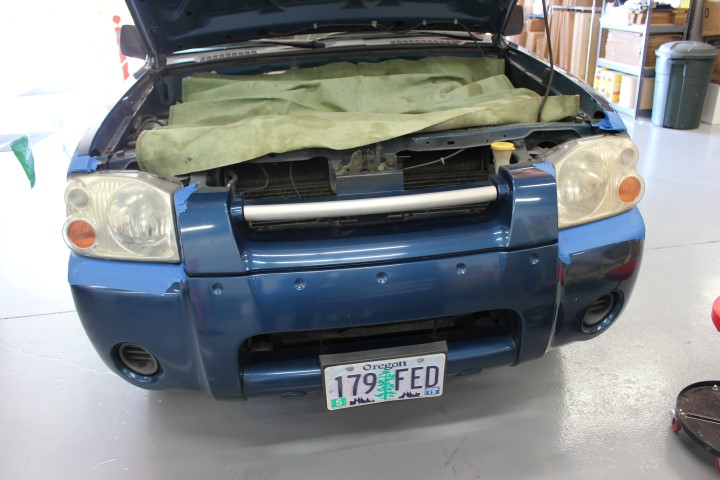
If it is determined that the hood should be up, a canvas tarp is used for the engine compartment, as the engine is often still hot when we begin the headlight restoration process and customers may not appreciate a bunch of melted plastic all over their engine. Imagine that! While many customers would not be concerned or even notice a bit of dust or a few drops of polish, it is always our goal to leave the customer’s vehicle in better condition than when we found it. Anything less is unprofessional in my opinion.
Protecting the vehicle’s paint throughout the sanding and polishing process should be a high priority for every headlight restoration technician, and spending a bit of extra time up front simplifies the cleanup process after the job is complete. In most cases, we find covering the fenders, front doors and roof of the vehicle provides adequate protection. If the vehicle is perfectly clean before the restoration we will also cover the windshield, however if the windshield is dirty, we will leave it uncovered and clean it thoroughly after the restoration.
Even more important is the careful masking around the headlights. We recommend using two layers of a high-quality painter’s tape to avoid damage to the plastic surrounding the headlight if the sanding disk comes in contact at any time during the restoration process. It’s not foolproof, but if using a random orbital tool, it definitely minimizes the chance of damaging the customer’s vehicle.
Look the vehicle over carefully before prepping for headlight restoration. Check for dents, dings, and imperfections in the paint. If the paint is fading or if there is any indication of previous bodywork or re-painting, be sure to note that as well. Take photos and notify the customer of any concerns. Remember, even though you are using painter’s tape and Delta Kits’ Clean-2-Prep, both of which are safe for use on plastics and painted surfaces, damage can occur to oxidized paint and plastics or improperly applied paint. This is fresh in my mind because just this week we noted the vehicles’ bumper had been damaged and presumably re-painted, but we failed to alert the customer.
When we removed the tape, a bit of paint came with it! We also had an incident on an older vehicle with extremely weathered plastic around the headlights. When we sprayed the headlights with Clean-2-Prep and wiped the over spray from the surrounding surface, the color, in this case gray, came right off! In both cases, the customers were very understanding. But, we all know there is a chance some customers would use an incident like this to get a new paint job for their vehicle. If they are not properly alerted to the potential for damage. Better safe than sorry!